Thursday, February 6, 2014

DIY FELT CROWN

The other day my lovely Modern Momma Lauren came over to help me with the DIY projects for an upcoming mini-session! She brought adorable Mac along with her, and I couldn't help but get off track and make him a cute little crown just to take pictures of him with! He is seriously the cutest, I just want to squeeze him up! This DIY took 10 minutes and cost under $5! 


Preferences
§
1
2
3
4
5
6
7
8
9
0
-
=
Backspace
Tab
q
w
e
r
t
y
u
i
o
p
[
]
Return
capslock
a
s
d
f
g
h
j
k
l
;
'
\
shift
`
z
x
c
v
b
n
m
,
.
/
shift
English
alt
alt
Preferences

DIY Heart Stamp + Print

Sharing a super easy DIY today! I love the way this turned out and would be so fun framed for a office or baby room! 

DIY Heart Stamp + Print

Need: 
Pencil, Utility Knife, 2pcs of Paper, Scissors, Stamp Pad, Tape

How To: 
-Carve pencil eraser into heart, does not have to be perfect.
Follow this link HERE to see more!

- Cut out a heart of any size out of 1 pc of paper and use a piece of tape to attach to the middle of your second piece of paper.
-Take your heart stamp and start stamping around your heart. Make sure you stamp closely to your heart to make a define heart shape.
-Remove your cut-out heart in the middle of your paper!
Enjoy! 

Monday, February 3, 2014

'You Rock' DIY Valentine by Brandi

Even though I call her a 'mean mom', she is actually a super cool mom that comes up with lots of fun ideas and inspirations for her boys, shhhh don't tell her I said that;)! When Brandi from Balee Images posted this Valentine on IG, I knew I wanted to share! Its earthy, rustic, not to mention adorable; but even better its in-expensive and perfect for boys!

'You Rock' Valentine 
By Brandi
Ashley may have dubbed me “the mean mom” for not putting candy in my kids’ Valentines, but I hope this project gets me back in their good graces.  Plus, she was kidding about that, wasn’t she???

My boys, ages 7 & 4, love to collect things – store bought, handmade, or just “treasures” they find – and the smaller the better.  When I scoured Pinterest for some inspiration for their class Valentines, my two requirements were A) no candy (okay, maybe that’s a little mean?) and B) no mushy-gushy romance stuff.  When I stumbled upon the rock idea, something they already collect, I knew it would be a winner!

This whole project took me about 20 minutes and couldn’t have been simpler.  I got everything I needed at Hobby Lobby, and I even pulled a few supplies out of my closet to keep the cost down.

Supplies
--rocks (if you don’t already have a collection, you can find bags of them in the floral section at Hobby Lobby)
--card stock or trading cards (you could use any shape, size, or color)
--hot glue gun & glue sticks
--stamp and/or markers
--paint pens

I originally envisioned myself hand-painting the faces on the rocks with acrylic paint and tiny brushes.  I found myself cursing my lack of tiny brushes when I went to start the project, but immediately rejoiced when I found my huge stock of paint pens!  This was 100 times easier than paint brushes ever would have been, and I absolutely recommend it.  I CANNOT draw, so we kept it simple: eyes, a basic smile, an occasional pair of eyebrows, and a few hearts.  I love how they each look different and unique, just like the recipients.

The original design that inspired this project featured a “you rock” stamp, with a little design and hearts.  I didn’t find anything similar but was pretty stoked to find a new product I’d never seen before in the clearance section at Hobby Lobby – score!  The Prima Press block lets you attach letters to form words for stamping.  I love this even more than a pre-made stamp because it kept the finished project looking simple and clean. 


I painted the rocks, attached them to the trading cards with my hot glue gun, stamped “you rock” on each one, and we still had a little bit of room left for a “signature.” Done and done. I hope these sweet boys of mine keep wanting to do projects with their mean mom forever!


Preferences
§
1
2
3
4
5
6
7
8
9
0
-
=
Backspace
Tab
q
w
e
r
t
y
u
i
o
p
[
]
Return
capslock
a
s
d
f
g
h
j
k
l
;
'
\
shift
`
z
x
c
v
b
n
m
,
.
/
shift
English
alt
alt
Preferences

Sunday, February 2, 2014

Gorgeous Summer Lake Wedding: Aileen & Jim: Lady and the Lens Photography

It's clear that everyone is over winter! Not only am I over it, but I am already looking into spring and into wedding season!SO... What better time to share this GORGEOUS summer wedding that we worked on last June! 

I met with Aileen last January, and she already had most of her vendors and knew what she wanted, she just needed someone to come in and help make it all make sense! We worked over the next 5 months picking out invites, talking place settings & favors, and to see it all come together was amazing and so much fun! Aileen and her groom Jim were so easy to work with, and after it was all said and done, I was even a little sad it was all over; BUT these fab pics bring it all back! 

From the venue to the unbelievable flowers, everything was just perfect for this drop dead GORGEOUS bride & her sweet groom! 

***VENDOR LOVE***


Friday, January 31, 2014

Top Fashion Picks for Spring

It's about this time every year at our boutique that the spring things start rolling in and I can't help but wish for the snow to be gone, and spring to arrive! As much as I love fall, spring fashion has got to be a close second! The refreshing color, and light weight sweaters get me so excited for sunshine and warmer weather! 

I was going to share a few things that I am loving at Whittaker House right now, but there were too many things I love, so I am sharing my 13(oops)  MUST HAVES for spring! 


1. Sanctuary Color Block Blouse 
2. Ecru Silk Jogging Pant
3. Bailey 44 Lace Tee
4. Katherine Barclay Leather Sleeve Crop Trench
5. Lucy Love Aztec Blouse
6. Big Star Denim Boyfriend 
7. Sanctuary Cotton Strip Sweater
8. Bailey 44 Leather Shoulder Crochet Front Dress
9. High Fashion Filigree Zip Handbag
10. Katherine Barclay Neon Sleeve Cotton Sweater
11. Sanctuary Cotton Stripe Dress
12. Sanctuary Jersey Tank Dress
13. High Fashion Neon Studded Handbag


Preferences
§
1
2
3
4
5
6
7
8
9
0
-
=
Backspace
Tab
q
w
e
r
t
y
u
i
o
p
[
]
Return
capslock
a
s
d
f
g
h
j
k
l
;
'
\
shift
`
z
x
c
v
b
n
m
,
.
/
shift
English
alt
alt
Preferences

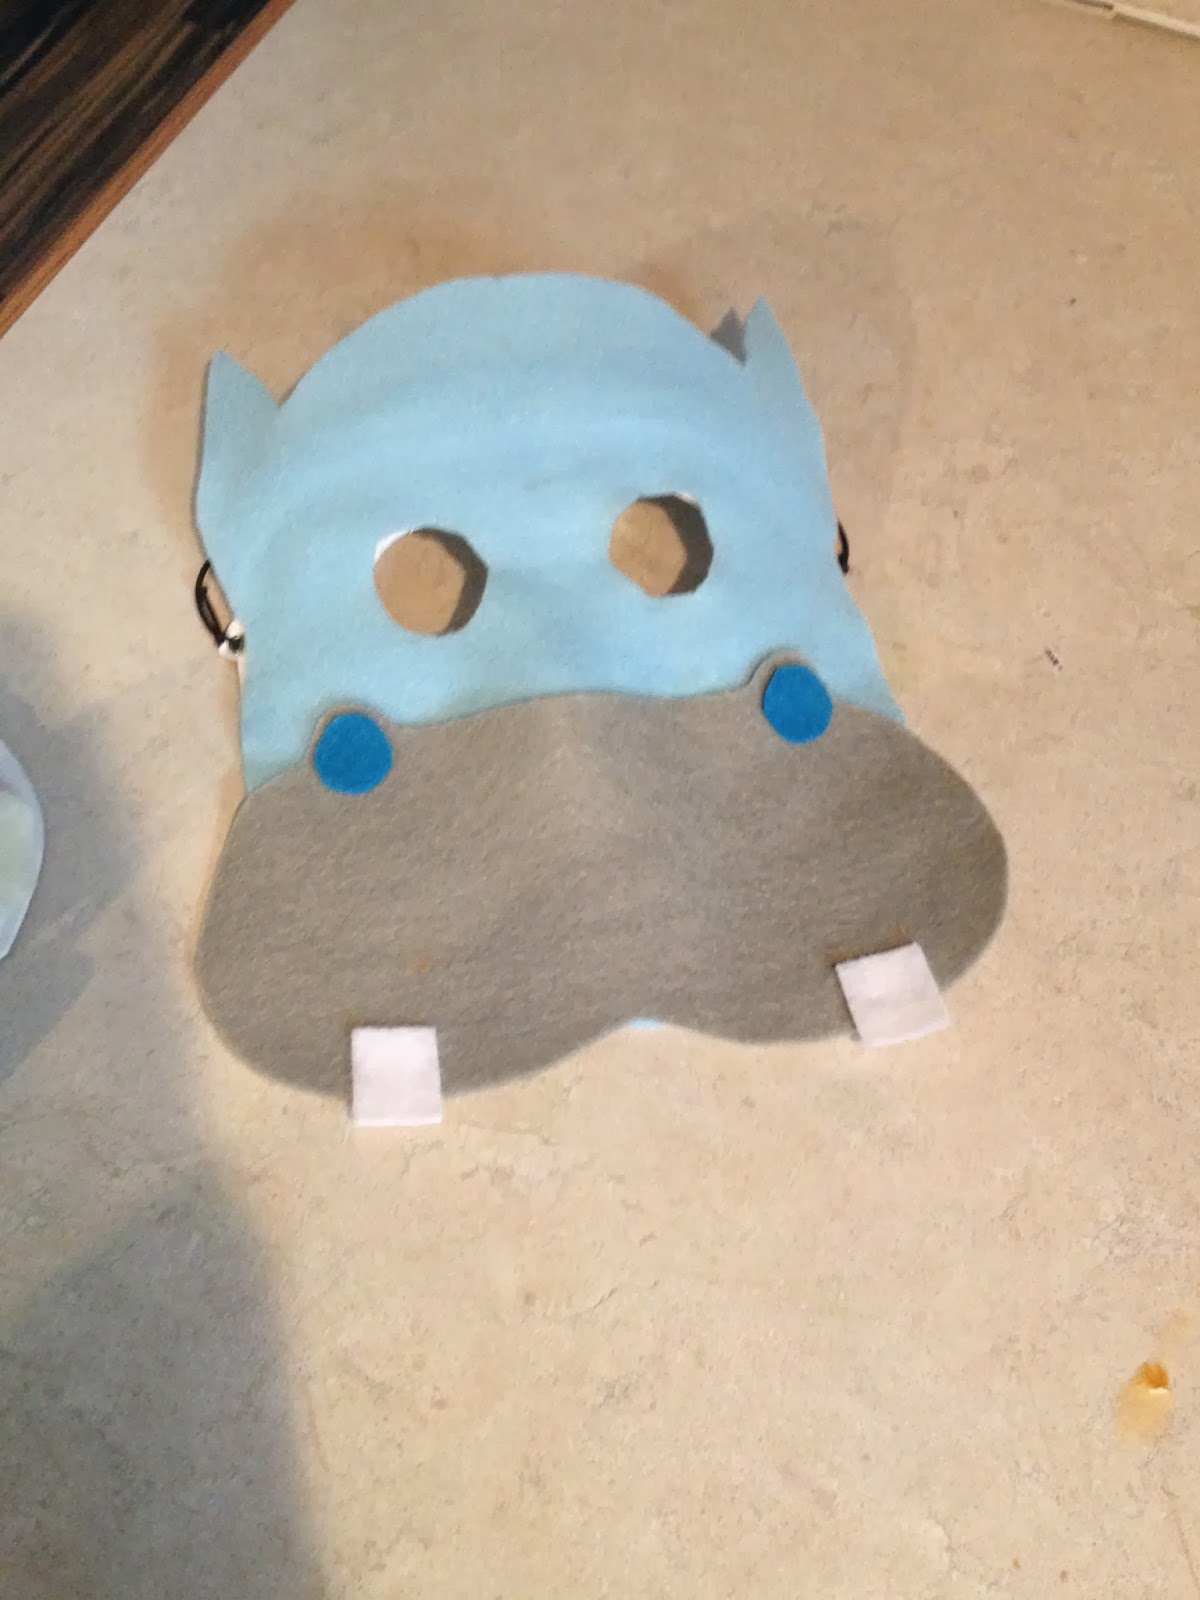
DIY Felt Animal Mask

Lauren our Modern Momma sent me this adorable DIY this morning, and I couldn't help but smile at the pictures! So CUTE!

Felt masks

Tools
Hot glue/tacky glue
Different colored felt
Foam or paper masks
Fabric scissors
Optional paper and pencil for stencil

I started out making a pattern with the hippo head then cheeks to get the right proportions. I really just eyeballed everything. Once everything was cut out I glued all the felt pieces together first with tacky glue. We'll that wasn't drying quick enough so I pulled out my glue gun and went to town. For the hippo I wanted it to have big eyes so I cut the mast to make them larger. Then I glued the felt on the mask. Perfect! For the bird I cut half moons out of the two colors. I did them all freehand and different sizes. I started hot gluing the bigger felt pieces around the edge. The next row just make sure you overlap them good enough so you don't show the edges or bottom.


Thursday, January 30, 2014

DIY {mini}Teepee

I found this adorable template online to make mini-Teepees! I decided to try it out and either the Indian or the dork in me loves it! ha! Fun for all ages and genders! 

Print out the template HERE!


Pin It button on image hover