Showing posts with label colorful. Show all posts

Monday, June 9, 2014

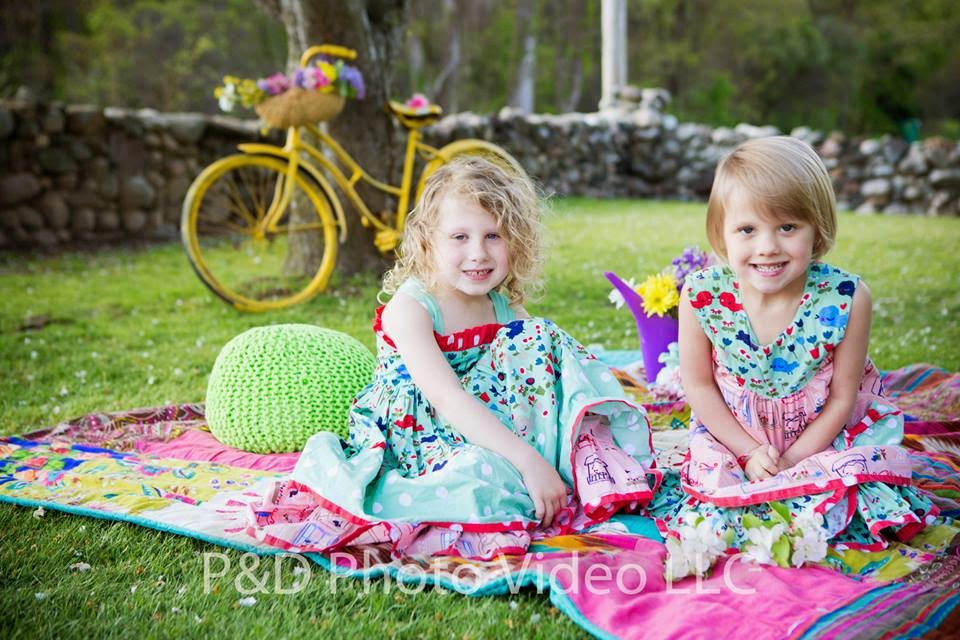
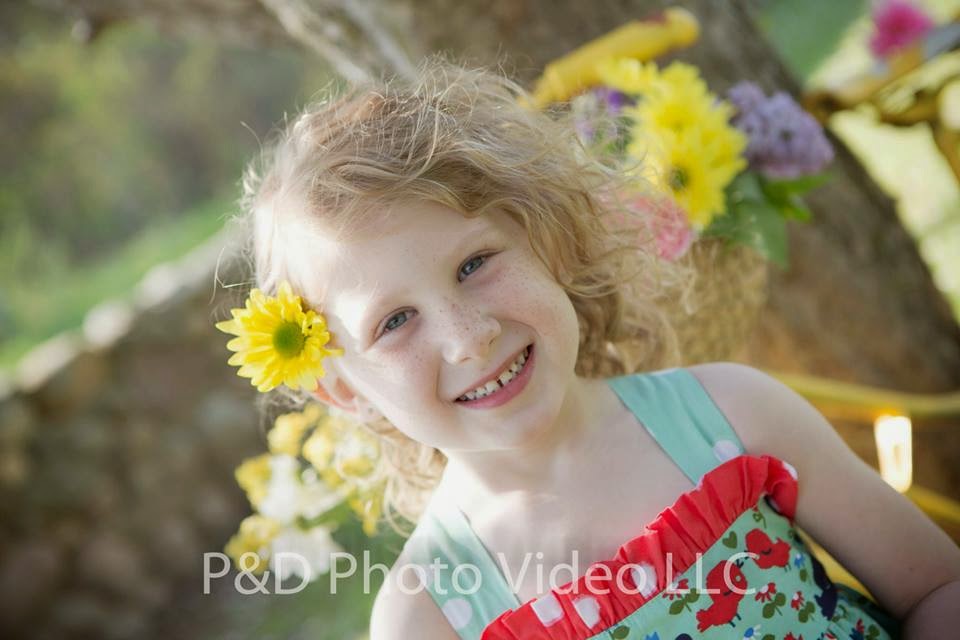
Sisters Styled Shoot

Last holiday we participated in a '12 Days of Giving' giveaway! Ashley Thunder Events partnered up with P&D Photo Video to give one lucky winner a styled photo shoot!

We met up a few weeks ago with the winner Whitney and her adorable daughters Piper & Harlow(love their names)! Whitney lives on the most gorgeous farm, so very little was needed to bring this shoot to life! Love the way these photos turned out, and love their little outfits next to some simple yet pretty styling! 


Friday, April 18, 2014

#ATEPartyShop Preview

The fact that I am writing this blog, makes me super nervous and super excited all at the same time! I am FINALLY opening my Etsy Store! I have been talking the talk for over a year now, time to walk the walk;)! I wanted to give a tiny little preview as to what and why I wanted to open a little party shop! 

As a party planner I am constantly wanting to make parties the best they can be, and me personally, I want to *of course* always go OVER.THE.TOP... but, I know that isn't for everyone! It takes a lot of time and money to plan a party, and all the little details can add up! I want to give people a resource to be able to purchase fun party supplies that won't break they bank, and add little details that will make your party special! 

I am taking some of my fun ideas and party decor, and turning them into mini party kits! For example, if you want to make cute favor bags with confetti and washi tape, you don't have to run all around town, or order from 3 places to get the all supplies you need, just hop on over to our shop and order the entire kit...party decor made easy! I plan on introducing new items that play off of #ATE ideas and inspirations a few times a year, and will also be offering custom orders! 

#ATEPartyShop is set to open May 1st, but in the meantime a few shots of what to expect to see in the shop! Thank you thank you to Balee Images for taking such pretty pictures of our supplies! XOX


Whose ready to shop?!?;)

Preferences
§
1
2
3
4
5
6
7
8
9
0
-
=
Backspace
Tab
q
w
e
r
t
y
u
i
o
p
[
]
Return
capslock
a
s
d
f
g
h
j
k
l
;
'
\
shift
`
z
x
c
v
b
n
m
,
.
/
shift
English
alt
alt
Preferences

Dip-Dye Easter Basket

Eggs are not the only thing that can be dyed this holiday...give your baskets a little dip in some Rit Dye, to make them extra special this year! (I also plan on trying this on regular household baskets soon)

Supplies: 
Rit Dye in Purple, String, Water, Natural Color Basket

How To: 
-Fill your sink with warm water and empty dye packet in(I have a stainless steel sink, so the dye does not affect it, if you do not, then you can use a bucket instead.)
-Dip Basket in and out of dye until desired color is wanted. 

-I personally had about 50 things going on at the time, so I tied a string to the handle of my basket, and then to my faucet so I could just let it hang there, and I didn't have to hold it:). You gotta do what you gotta do, right?!;) ***See picture for this crazy contraption***


Monday, April 14, 2014

5 New Wedding Trends We're LOVING...

I am not a 'tradition' kind of girl...who says traditional fits my style?!? It usually doesn't. I LOVE LOVE LOVE unique and fun out of the box ideas when it comes to weddings. Its 'Your' wedding day, why try and make it something its not, and something you are not. I whole heartedly feel that a wedding should be a perfect balance between the couples style, and not what everyone says it 'should be'. Break the mold, and be different. 

Here are our 5 favorite new wedding ideas that are currently trending for the unique brides...

1. MIS-MATCH BRIDESMAIDS: It doesn't get more on-trend than this! First off, I will be the first to tell you brides... strapless does NOT look good on everyone! Love the idea of having all bridesmaids pick something(with your direction) that looks great on them personally, all the while making your wedding look 'hip and cool'! 


 2. MARQUEE LIGHTS: These lights speak for themselves! Where its the couples initials or outlines the bar area, personally I think these are a 'must-have'! 
Clockwise from the top left: LETTER HEADSSweet InitialsBAR HEREDance floor Darlings


 3.UN-RULEY FLORALS: Probably the inner flower child in me, but I absolutely adore these 'unruly' flower arrangements! How gorgeous are these!!! 
Clockwise from the top left: Colorful PopEARTHY ROMANTICWILDFLOWER GARDENVINTAGE BOHEMIAN


 4.DINNER BOXES: Ok, really, how adorable are these 'lunch boxes'. I am obsessed with the idea of this personalized dinner option!


 5.PATTERN PLAY: If you know me well, you know this is my favorite new trend! Love mixes bright colors and patterns to make a rad and visually appealing table! 
Clockwise from the top left: GARDEN PARTYGEO SOUTHWESTRUSTIC FLORAL : VINTAGE BOHEMIAN

Monday, April 7, 2014

DIY Garden Markers

Spring is so close I can feel it... so I decided to get my little plants ready for my garden, and added some colorful markers along the way.

 My plants are ready, my markers are ready, now just waiting on you spring. 

DIY Garden Marker Supplies: 
Clay, Letter Stamp Set, Rolling Pin, Pizza Cutter

How To: 
Step 1: Use your rolling pin to flatten your clay to about a quarter inch.
Step 2: Use your pizza cutter to cut out your marker, making a point at the bottom to stick your marker into the ground with.
Step 3: Take the stamps and *without ink* stamp your letters into the clay.
Step 4: Let dry for 24 hours.


Preferences
§
1
2
3
4
5
6
7
8
9
0
-
=
Backspace
Tab
q
w
e
r
t
y
u
i
o
p
[
]
Return
capslock
a
s
d
f
g
h
j
k
l
;
'
\
shift
`
z
x
c
v
b
n
m
,
.
/
shift
English
alt
alt
Preferences

Thursday, March 20, 2014

DIY: Paper Cacti

Call it spring fever, call it going crazy, but the modern momma Lauren and I have been going coo coo for cacti lately! I stopped over to her house yesterday so that she could recover some adorable little stools for me(see them on my Instagram HERE!); and we decided to make some paper cacti! You know the kind that you can't kill;)! Me and my black thumb over here are loving the idea of paper plants! haha, no but really these are adorable, and super easy to make! Perfect little craft for the kiddos too! 


Ps. How cute are Lauren's little shot glassed full of succulents! Love that idea! 

Happy first day of spring! XOX
Preferences
§
1
2
3
4
5
6
7
8
9
0
-
=
Backspace
Tab
q
w
e
r
t
y
u
i
o
p
[
]
Return
capslock
a
s
d
f
g
h
j
k
l
;
'
\
shift
`
z
x
c
v
b
n
m
,
.
/
shift
English
alt
alt
Preferences

Monday, March 17, 2014

6 Fun Spring Looks: Head to Toe


Yesterday I talked my adorable little sister into coming in to our boutique Whittaker House and trying some of my favorite spring looks on, so I could photograph them and show them to you all!! I mean seriously, how cute is she! 

 I think we can all agree... I have NEVER been so ready for spring weather and spring clothing! After combining all the looks into one place, I think its safe to say that spring will be all about neutrals with bright pops of neon and coral! I also am loving bright statement necklaces, oversized totes, and studded everything!! 


Saturday, March 15, 2014

Girlfriend Gift: Anti-Pinch Polish: St. Patty's Day DIY


I saw a similar idea on Pinterest a few weeks back and wanted to do a version of it and offer a free printable! Love this idea, for a little girlfriend gift....We all could use those once in a while!


Need: White Card Stock, Clear Treat Bag, Kraft Confetti Filling, Hole Punch, Twine, Scissors, Bottle of Green Nail Polish, & and the Free Printable(Link Below)

***DOWNLOAD THE FREE PRINTABLE HERE!

How To: 
-Print and cut out the free printable.
-Fill treat bag with kraft confetti and the nail polish.
-Fold over top of printable and attach to folded top of treat bag. 
-Hole punch the bag and paper, and tie with twine to attach.


Preferences
§
1
2
3
4
5
6
7
8
9
0
-
=
Backspace
Tab
q
w
e
r
t
y
u
i
o
p
[
]
Return
capslock
a
s
d
f
g
h
j
k
l
;
'
\
shift
`
z
x
c
v
b
n
m
,
.
/
shift
English
alt
alt
Preferences
Pin It button on image hover